
Ceiling to Wall
General frame structure
This structure is attached to the ceiling and the wall.
The ceiling will carry the load, so it’s important to ensure that the unit is reinforced / secured to studs or wood in the ceiling.
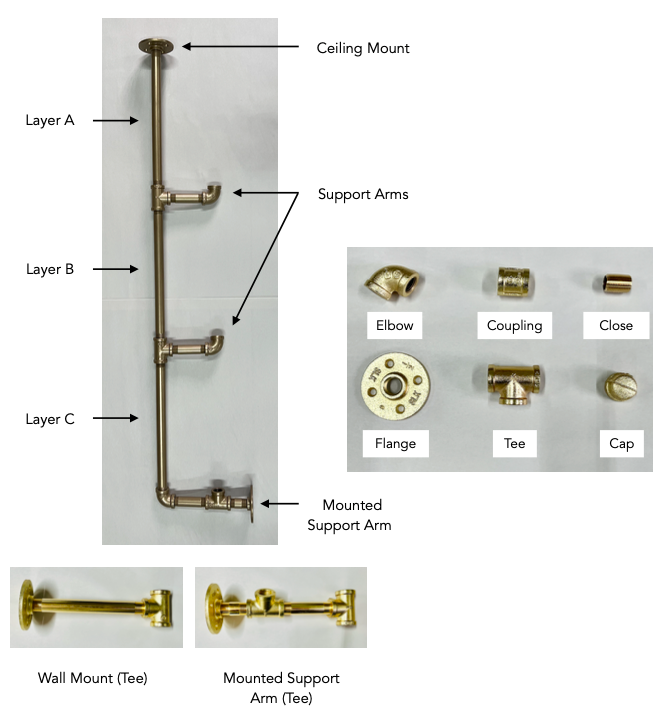
Identifying your parts
Use these reference photos with the install instructions to make install a breeze! Note not all units contain every part labeled - refer to the card in your package for your full parts list.
Instructions
1. Using the reference photos above, lay out all the pieces to get a sense for how everything will be assembled.
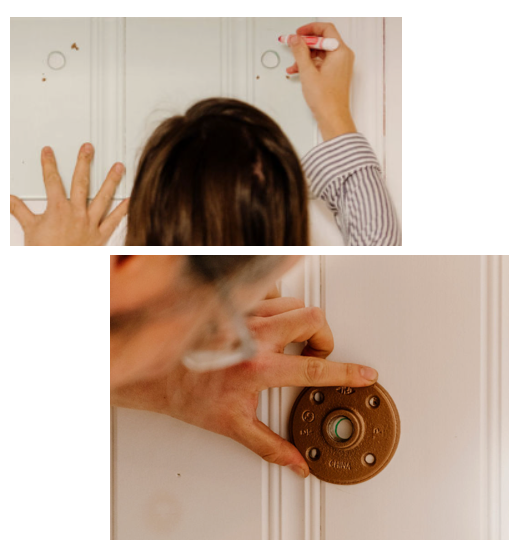
2. This process will require at least two people. Hold the pane of glass against the ceiling where the unit will be installed with the back edge of the shelf 1⁄2” from the wall. The holes in the glass should be at the furthest point away from the wall. Hold the Mounted Support Arm against the wall to be sure the distance is correct - the hole in the glass should line up with the elbow. Trace the outline of each hole on the ceiling. This is where the ceiling mounts will be placed.
Pro Tip: If the glass is too heavy to hold against the ceiling, you can make a cardboard template of the glass. Just be sure it is extremely precise, as this will determine the placement for your ceiling mounts.
Next Steps
3. Loosely secure each flange to the ceiling, centering the large hole of the flange with your traced circle. The flange should touch the ceiling, but the screws should not be fully tightened so there is a little bit of play available when mounting the bottom.
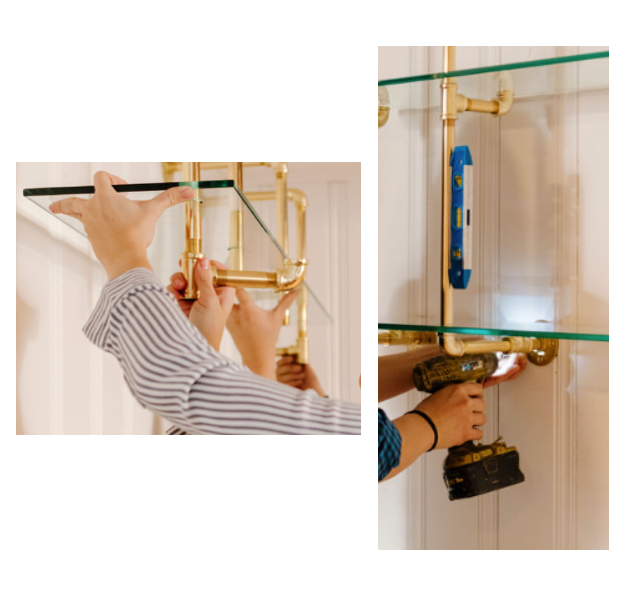
4. Using your parts list for reference, attach Layer A to the ceiling mount, and slide on the top shelf. Twist on the Support Arms and gently lower the shelf to rest on the Support Arms. Work your way down, shelf by shelf, until you get to the bottom.
5. Using a level, straighten the rails and mount the Mounted Support Arms (Elbow) to the wall using one screw. Step back and assess the straightness. Then add the remaining screws and tighten the screws in the ceiling flanges.