Counter to Wall - Low Profile
General frame structure
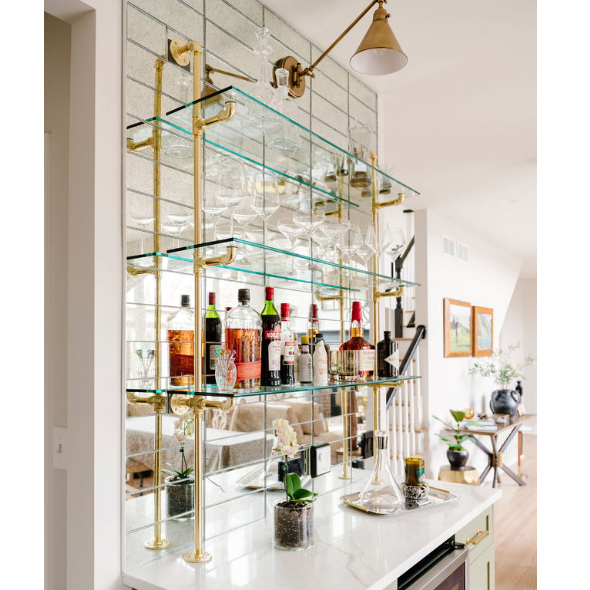
This structure is mounted to the wall on the top and rests on the counter. Arms face outward so rails are closer to the wall.
The walls will carry the load, so it's important to ensure that the unit is reinforced / secured to studs or wood.

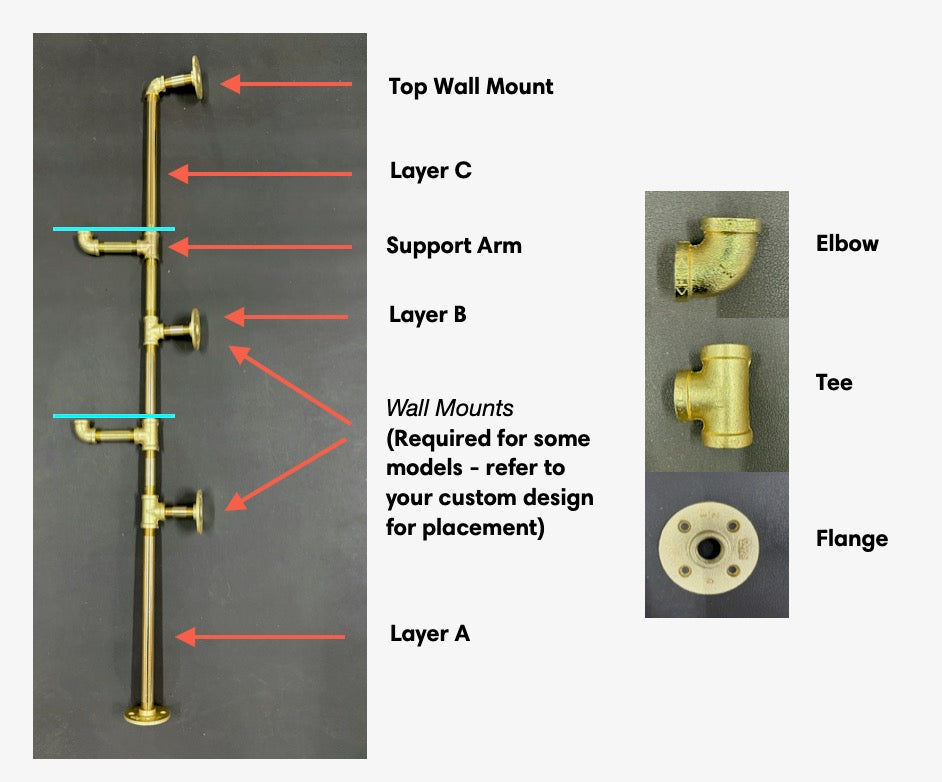
Identifying your parts
Use these reference photos with the install instructions to make install a breeze!

Instructions
1. Attach the first support arms to Layer A. The wall mount should point to the rear (against the wall) and the support arms should face in the opposite direction.
2. Add the pipe length for Layer B and slide your first shelf into place.
3. Stand the unit in place on the counter. Ensure the shelf and rails are level, then secure the wall mounts with screws provided.
4. Continue to build the unit upwards by adding vertical rails, support arms, and shelves.

Next Steps
5. When you reach the top layer, twist on the top wall mounts. Confirm everything is straight and level - Pro tip: trust your eyes too! If your level is showing a unit is straight but it looks off to you, try placing the level on the floor or wall - it may not be perfectly level, so you'll want to find the happy medium between the tools and what "looks right"
6. Secure remaining wall mounts with screws provided.
