
Counter to Wall
General frame structure
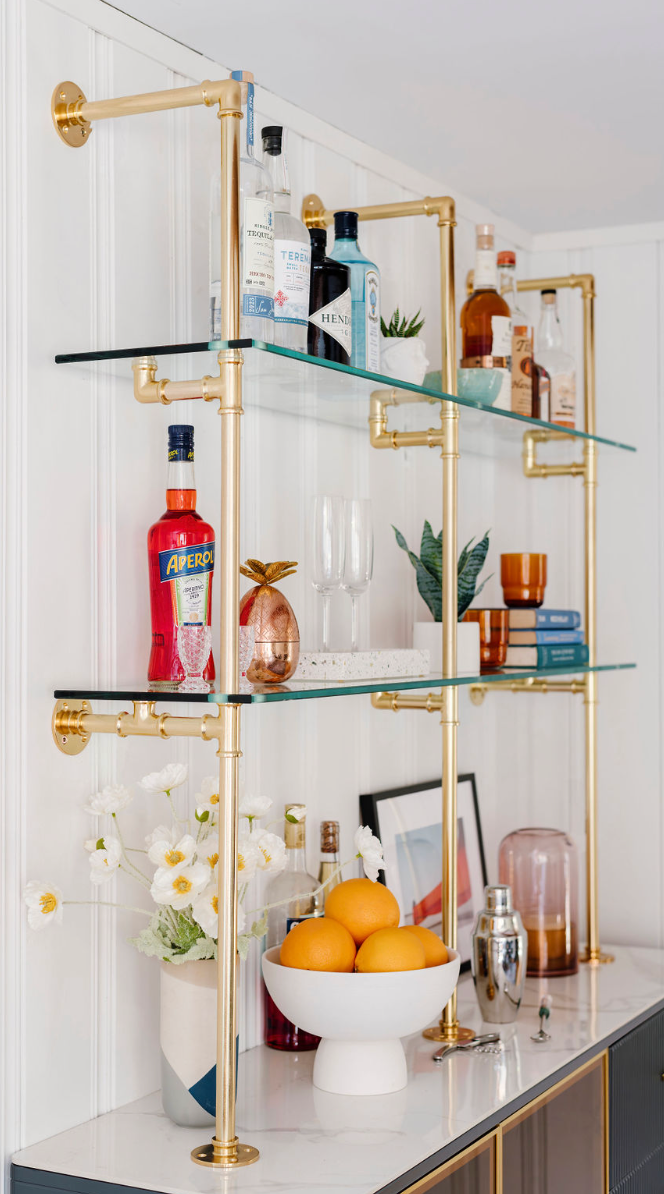
The unit stands on the counter (without being secured) and mounts to the wall on the top and underneath the bottom shelf (not always applicable).
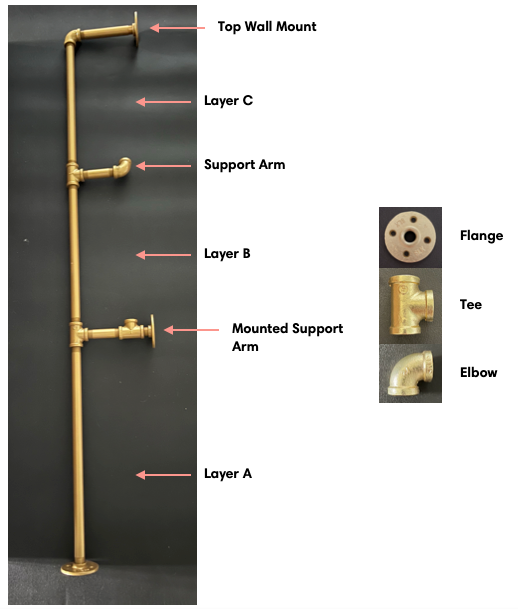
Identifying your parts
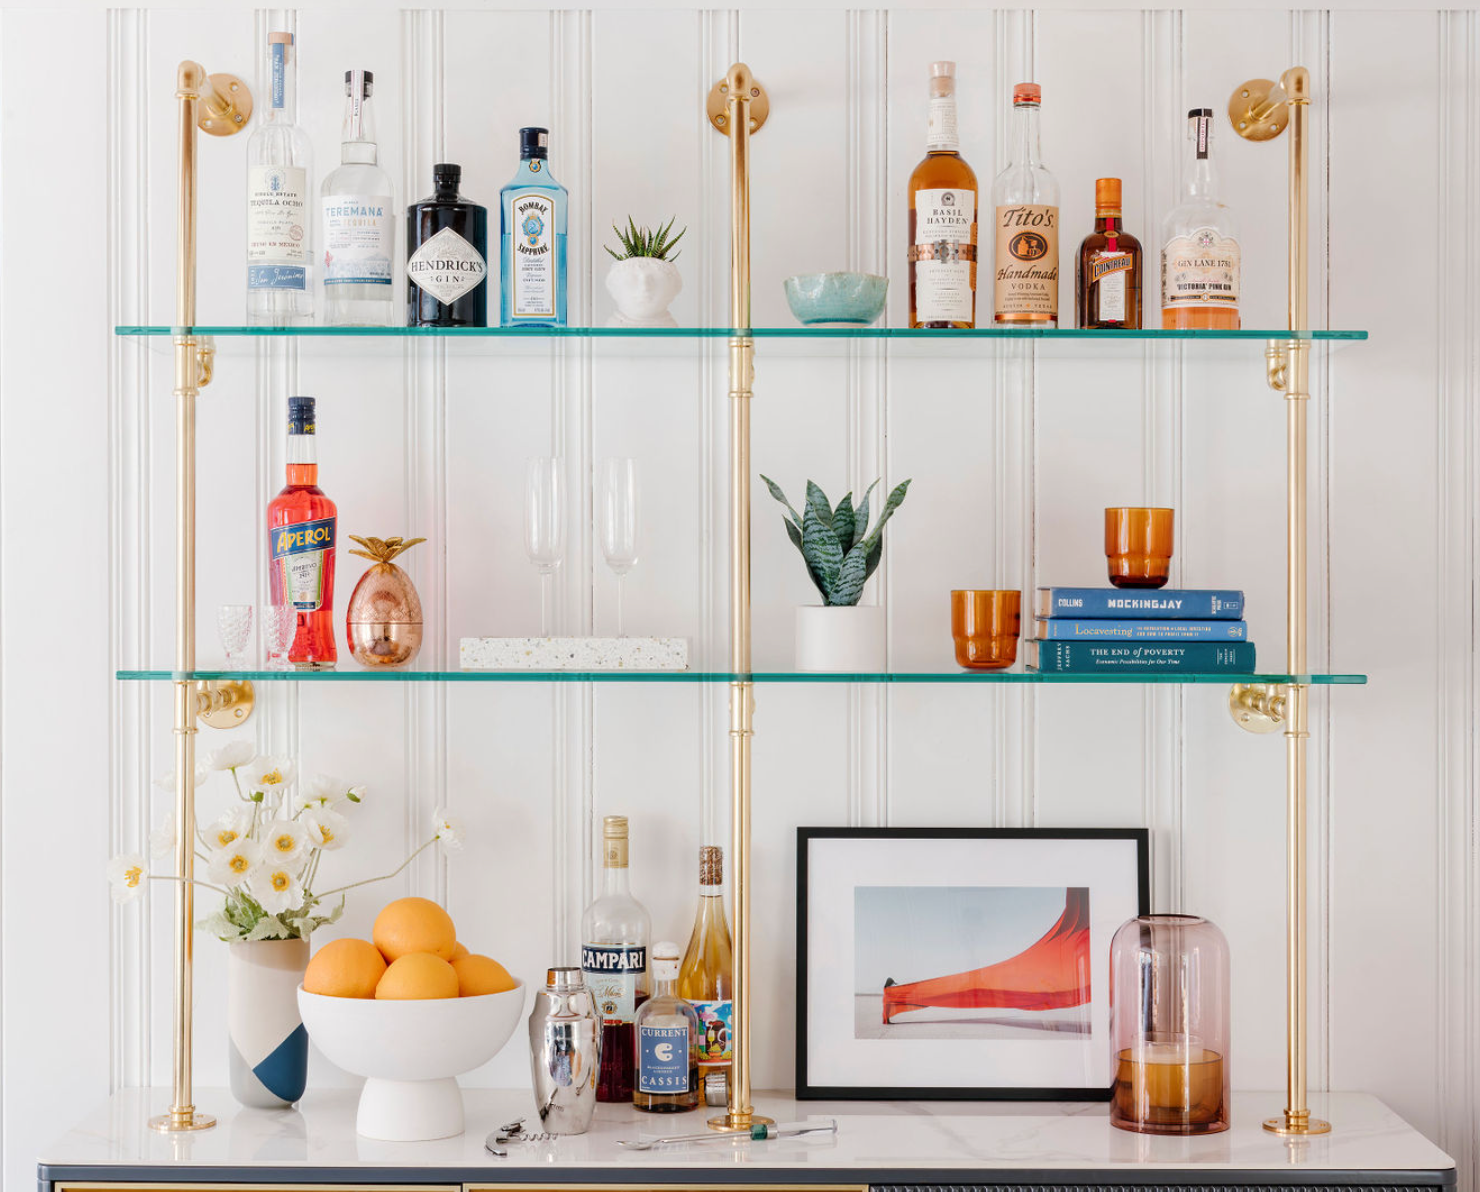
Use these reference photos with the install instructions to make install a breeze!
The Basics
The shelf will be assembled from the bottom up. Once you put the first shelf on, place it near or at its final position (standing on cardboard or a drop cloth as needed to protect the counter / floor) -- then build the remaining shelves upwards against the wall. You may need to provisionally secure a mount under the first shelf to hold the unit in place.
You will build the shelf row by row upwards until the entire shelf is complete.
The bulk of time will be micro adjusting and optimizing the shelf before it is screwed into the wall.
Instructions
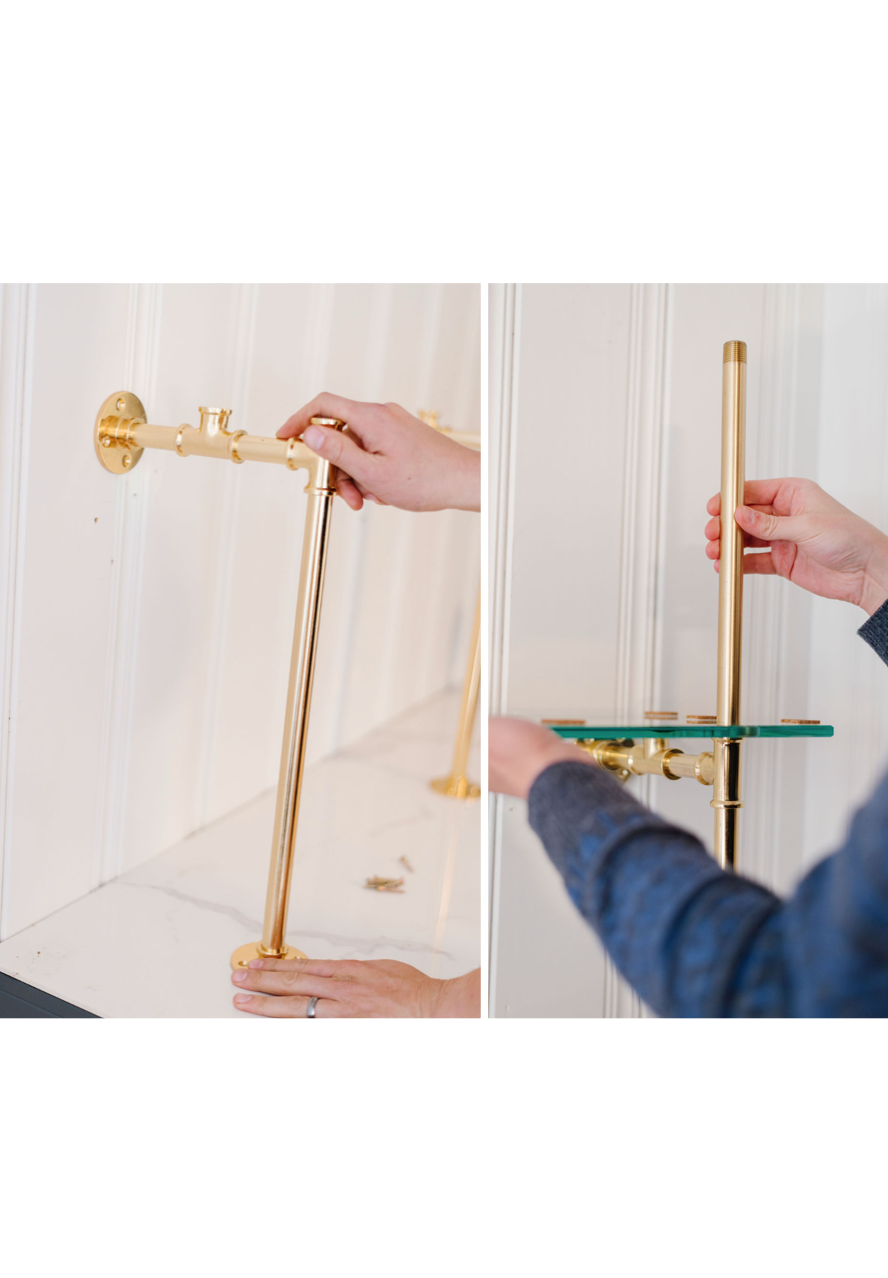
1. Connect the bottom Flanges, Layer A, and first set of Support Arms (including a Mounted Support Arm, if applicable). Don’t over tighten the pipes – just find resistance.
2. Add the first shelf, and then stand the unit on top of the bar. If the unit feels like it will not lean and stand on its own, use a screw to temporarily screw the first layer wall mount into the wall.
3. Add on the next Layer and continue to build the unit up against the wall.
4. Once you’ve placed the last shelf in place, twist on top mounts which connect to the wall. Stand the unit up in place at or near its final placement. Using a level, adjust the pipes as needed to ensure they’re straight and level. Pro tip: Trust your eyes too! If the level is showing a unit is straight but it looks off to you, try placing the level on the floor or wall - it may not be perfectly level, so you’ll want to find the happy medium between the tools and what “looks right”.
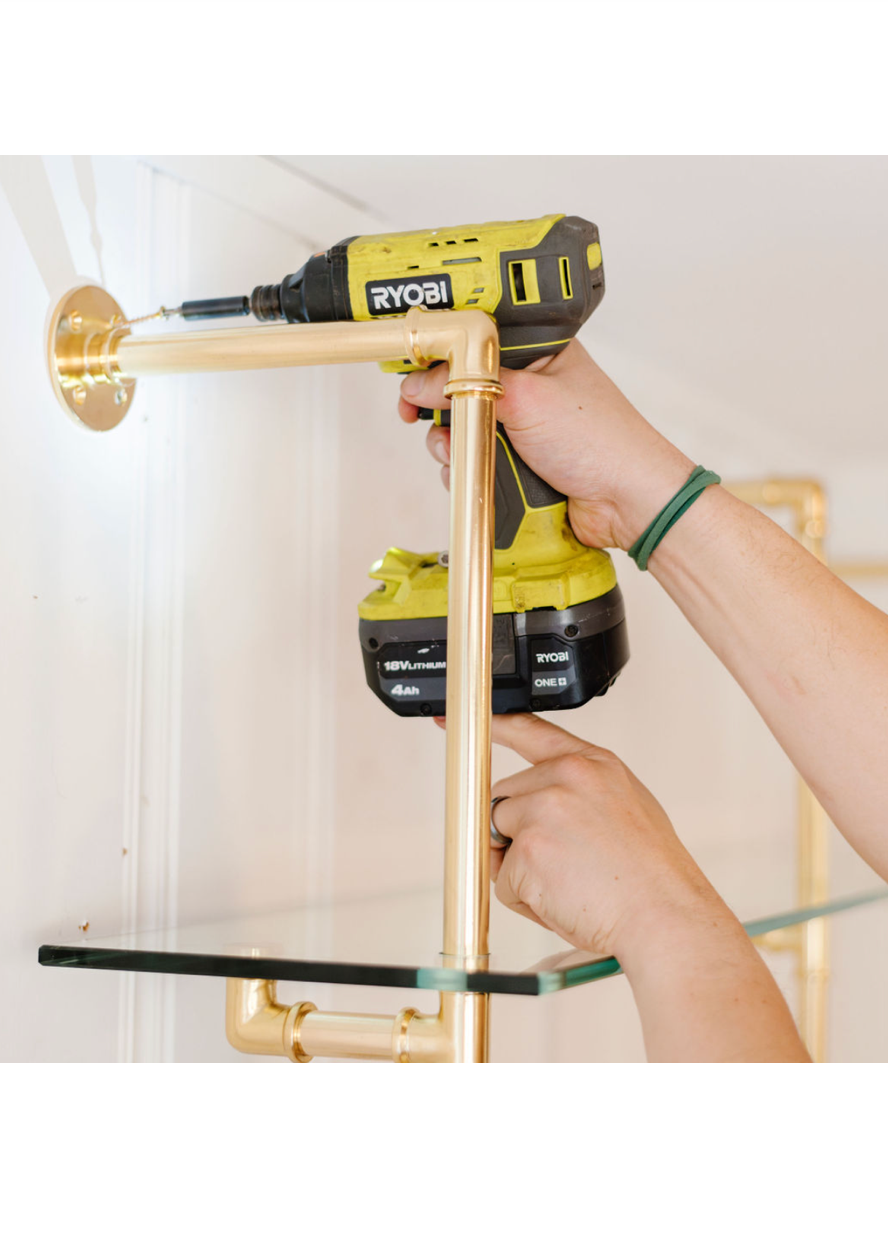
5. Once the shelf seems straight, secure each top bracket with ONE screw by holding the flange flush against the wall, and drilling a hole THROUGH the flanges holes with a 3/16” bit. You can directly insert the anchor through the flange into the ceiling.(You don’t need to mark the hole, drill, insert anchor, move it back, etc.) If it looks good after putting one screw in each rail, go ahead and do the rest of the anchoring.
6. Starting at the top, straighten out all of the Support Arms. The best way to do this is hold the arm above as you straighten the one below.
7. Secure the remaining wall mounts.
8. Style it up!