
Ceiling to Counter
General frame structure
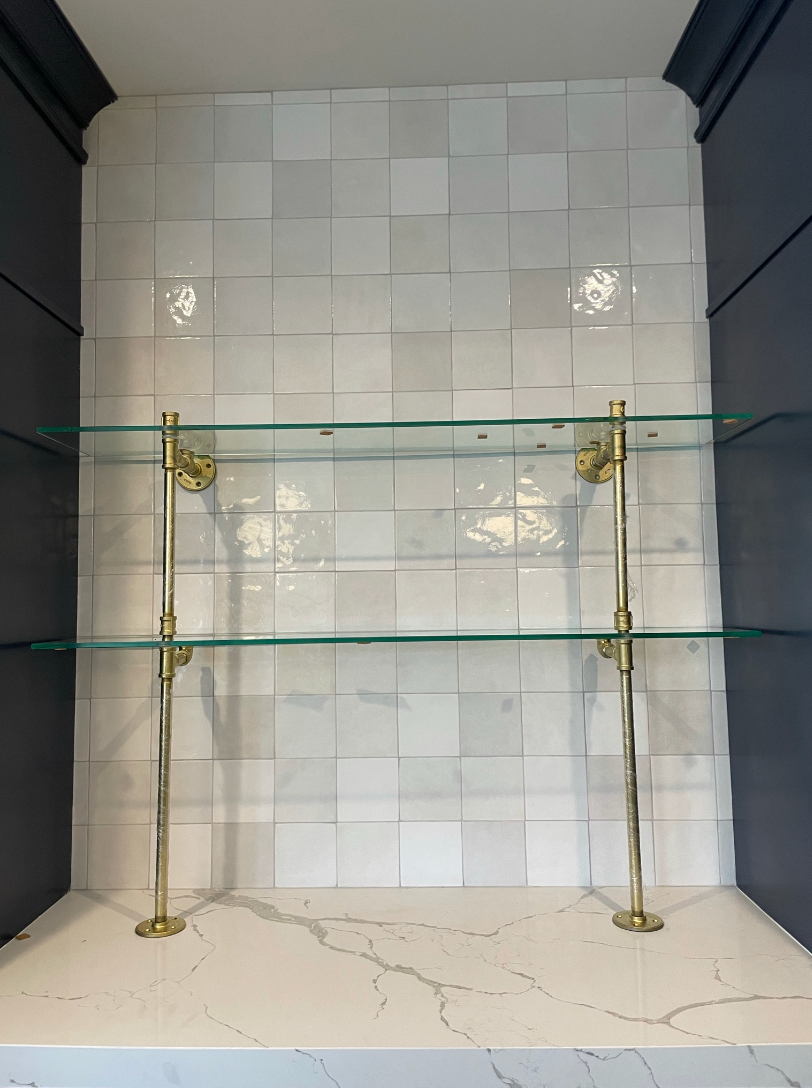
The unit stands on the counter (without being secured) and mounted to ceiling on the top.
Variation 1: There may be wall mounts for an intermediate shelf (shown under second shelf on the right). These do not need to be secured to the wall, but help prevent flexing.
Variation 2: Some units will have a coupling above each shelf. In these units, each layer will have a short pipe and coupling above each support arm.
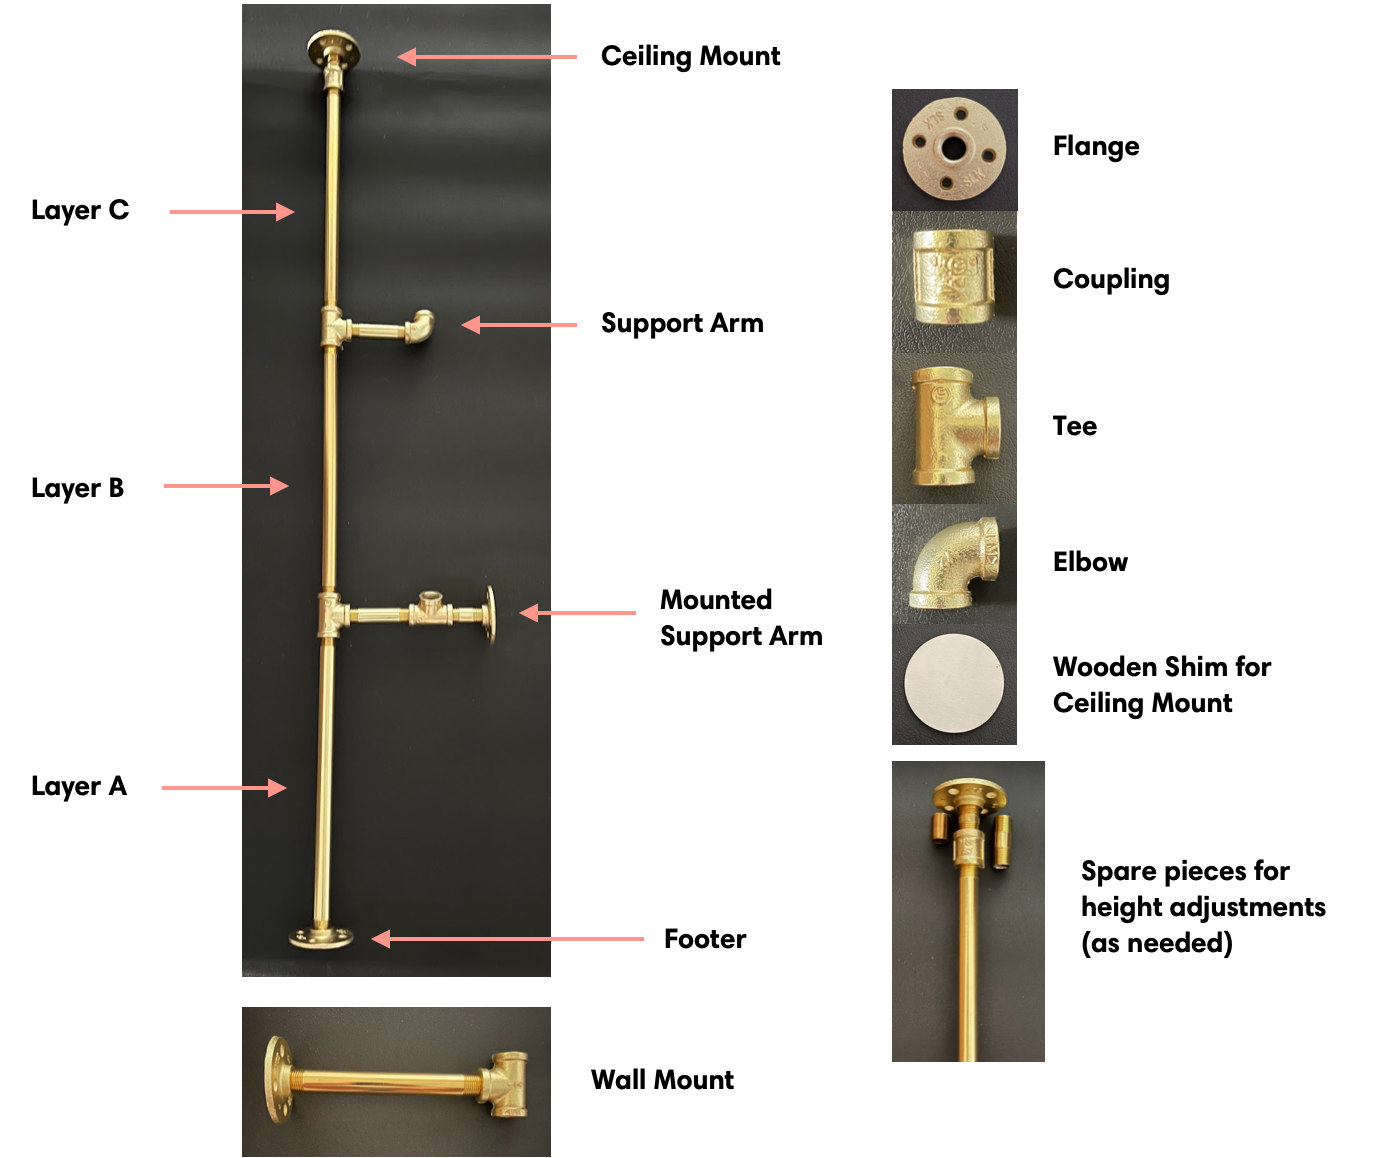
Identifying your parts
Use these reference photos with the install instructions to make install a breeze! Note not all units contain every part labeled - refer to the card in your package for your full parts list.
The Basics
The shelf will be assembled from the bottom up. Once you put the first shelf on, place it near or at its final position (standing on cardboard or a drop cloth as needed to protect the counter / floor) -- then build the remaining shelves upwards against the wall. You may need to provisionally secure a mount under the first shelf to hold the unit in place.
You will build the shelf row by row upwards until the entire shelf is complete.
The bulk of time will be micro adjusting and optimizing the shelf before it is screwed into the ceiling.
Instructions
1. Lay out all the pipes to get a sense for how they will be assembled. Identify the relevant glass pieces (if they are different). Because this piece has to fit cleanly from counter to ceiling, we would recommend fully assembling the rails and trying to hold them in place to be sure the height is correct.
2. Connect the Footers and first layer of Support Arms (V1: including a support arm with a wall mount). Don’t over tighten the pipes–just find resistance.
3. Add the first shelf, and then stand the unit on top of the bar. (V2: If your unit has couplings, place the shelf between the tee and coupling and tighten down.)
4. Add on the next set of Support Arms and continue to build the unit up against the wall.
Next Steps
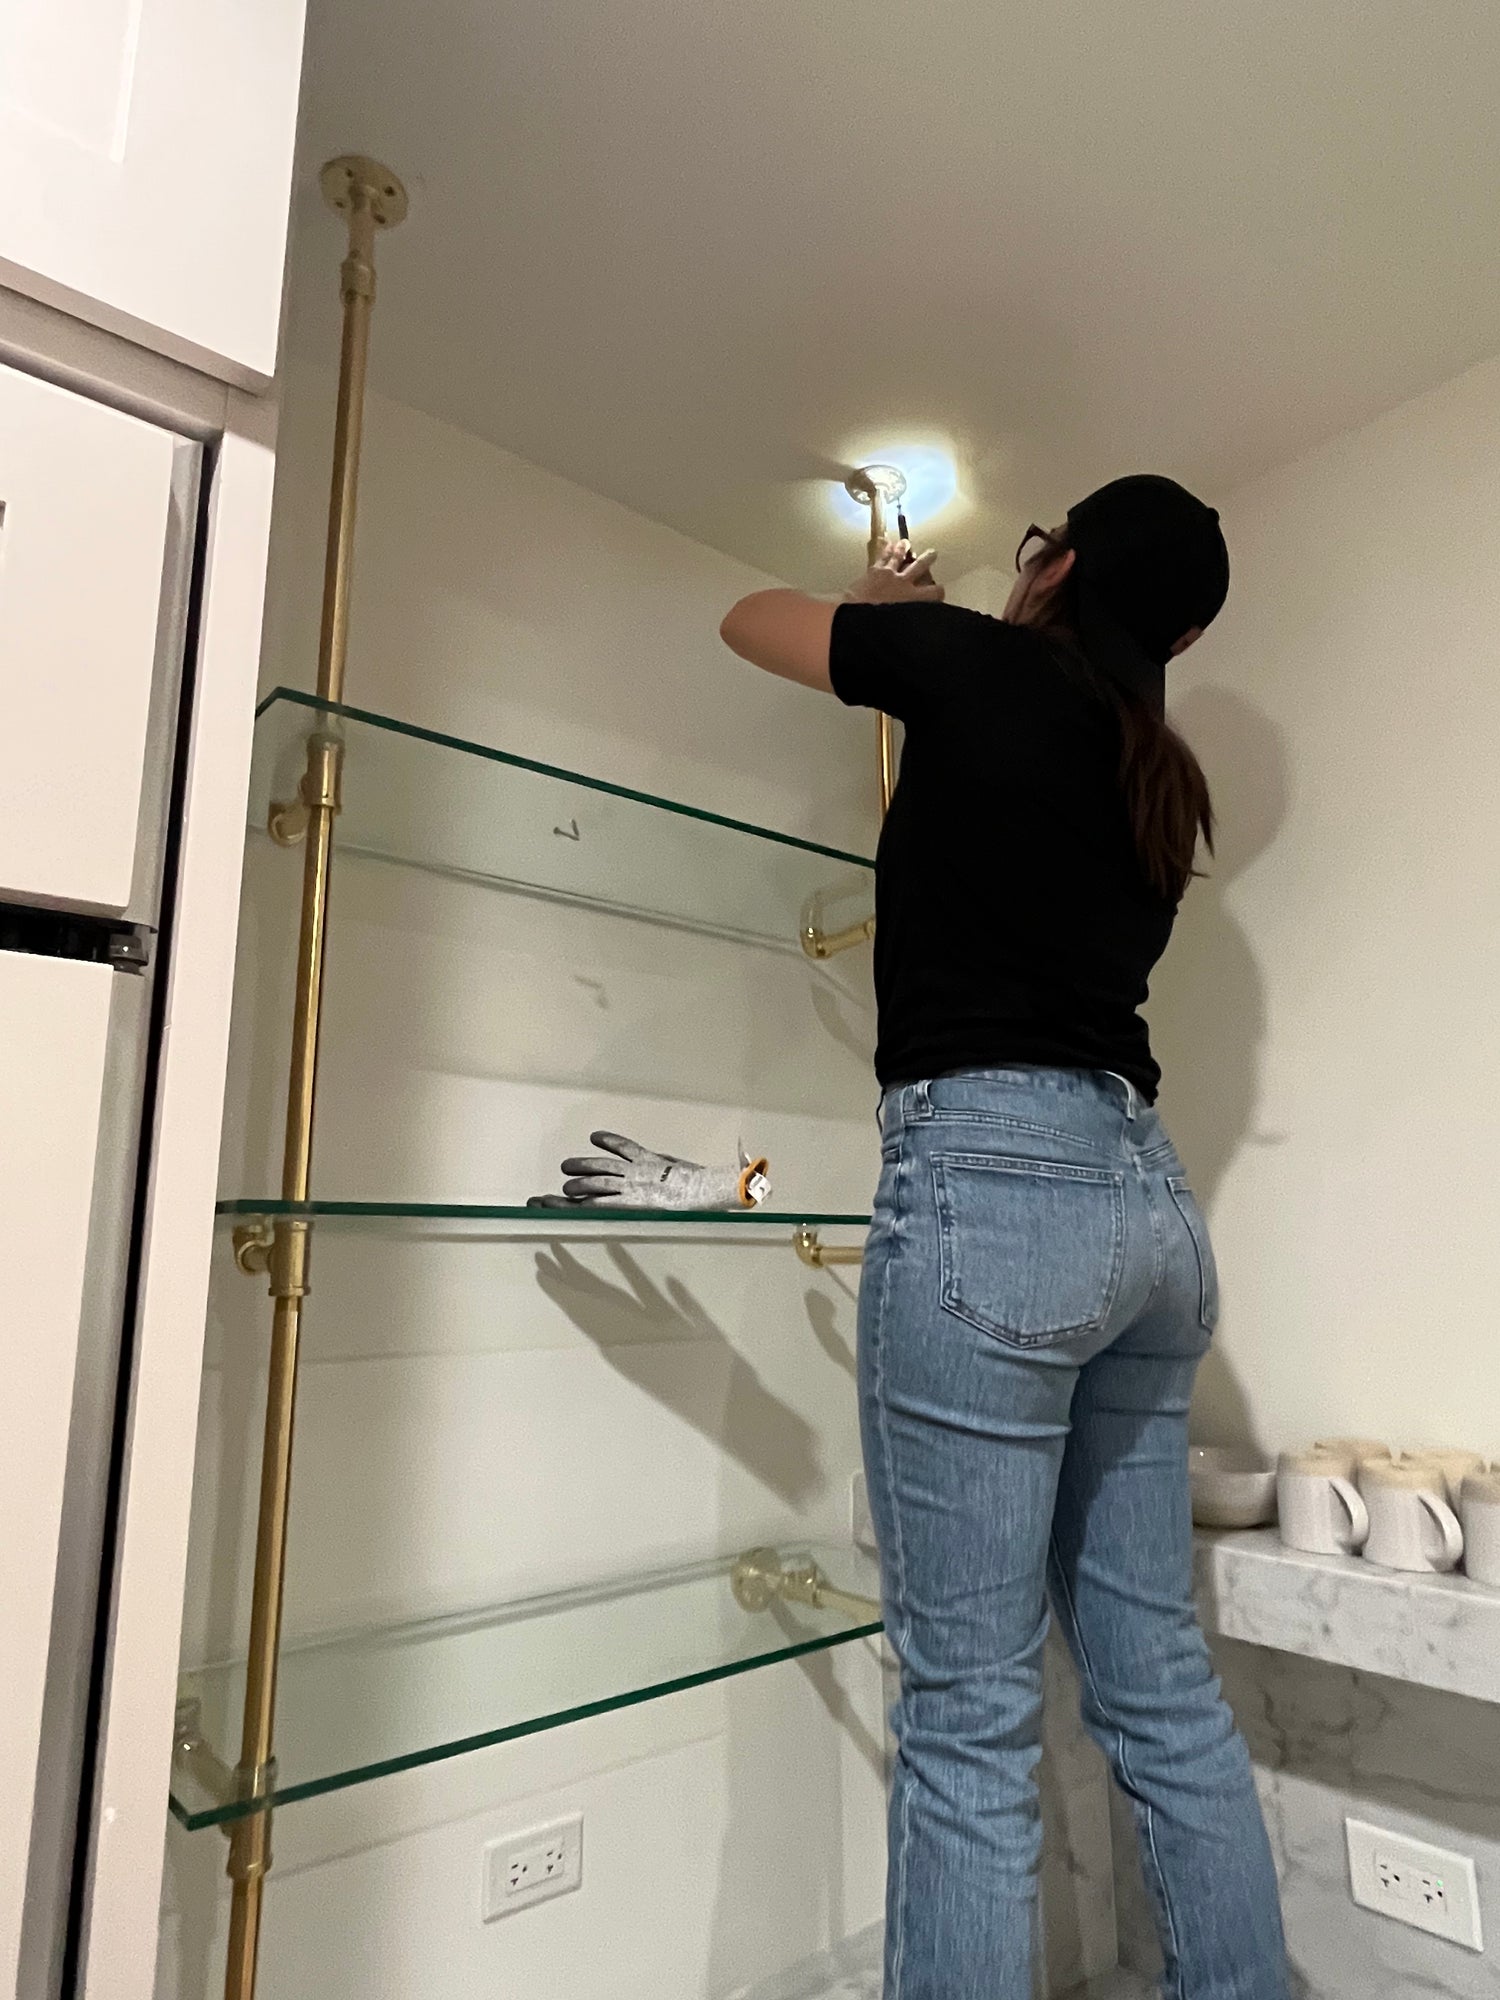
5. Once you’ve placed the last shelf in place, twist on the top flanges which will connect to the ceiling. This part of the process is often the most time consuming, as you may need to tighten down the top flange (or lower levels) and then reverse them to get the ceiling mount flush.
6. Once the shelf seems straight, secure each top bracket with ONE screw by holding the flange flush against the ceiling, and drilling a hole THROUGH the flanges holes with a 3/16”bit. You can directly insert the anchor through the flange into the ceiling. (You don’t need to mark the hole, drill, insert anchor, move it back, etc.) If it looks good after putting one screw in each rail, go ahead and do the rest of the anchoring.
7. Starting at the top, straighten out all of the Support Arms. The best way to do this is hold the Support Arm above as you straighten the one below, which will help keep things straight as you work your way down.
8. Secure the remaining wall mounts.
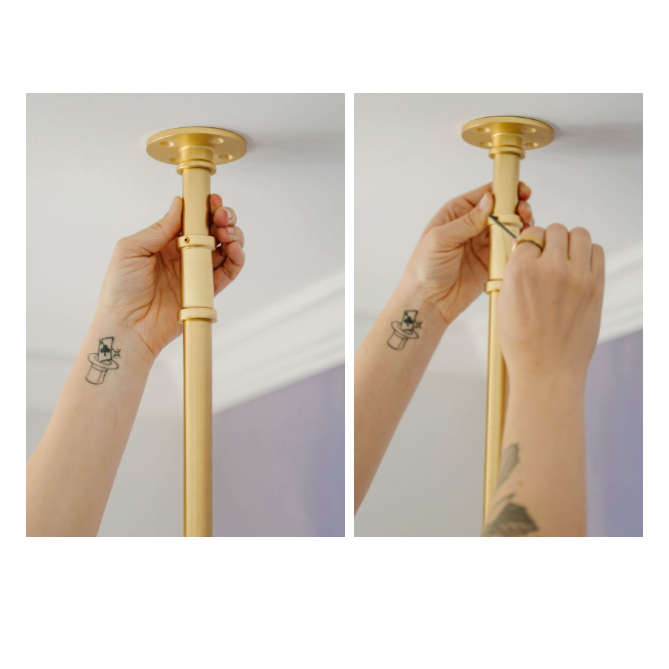
Modern Loft Units
Your top layer will have a set screw coupling and a half-thread rail.
Twist the threaded end into the ceiling mount and then slide the rail into the top of the set screw coupling. Slide the half-thread rail up inside the coupling to bring the flange flush with the ceiling, then secure the set screw.
If extra height is needed you can also slightly back the top layer rails out of the coupling fittings below.