
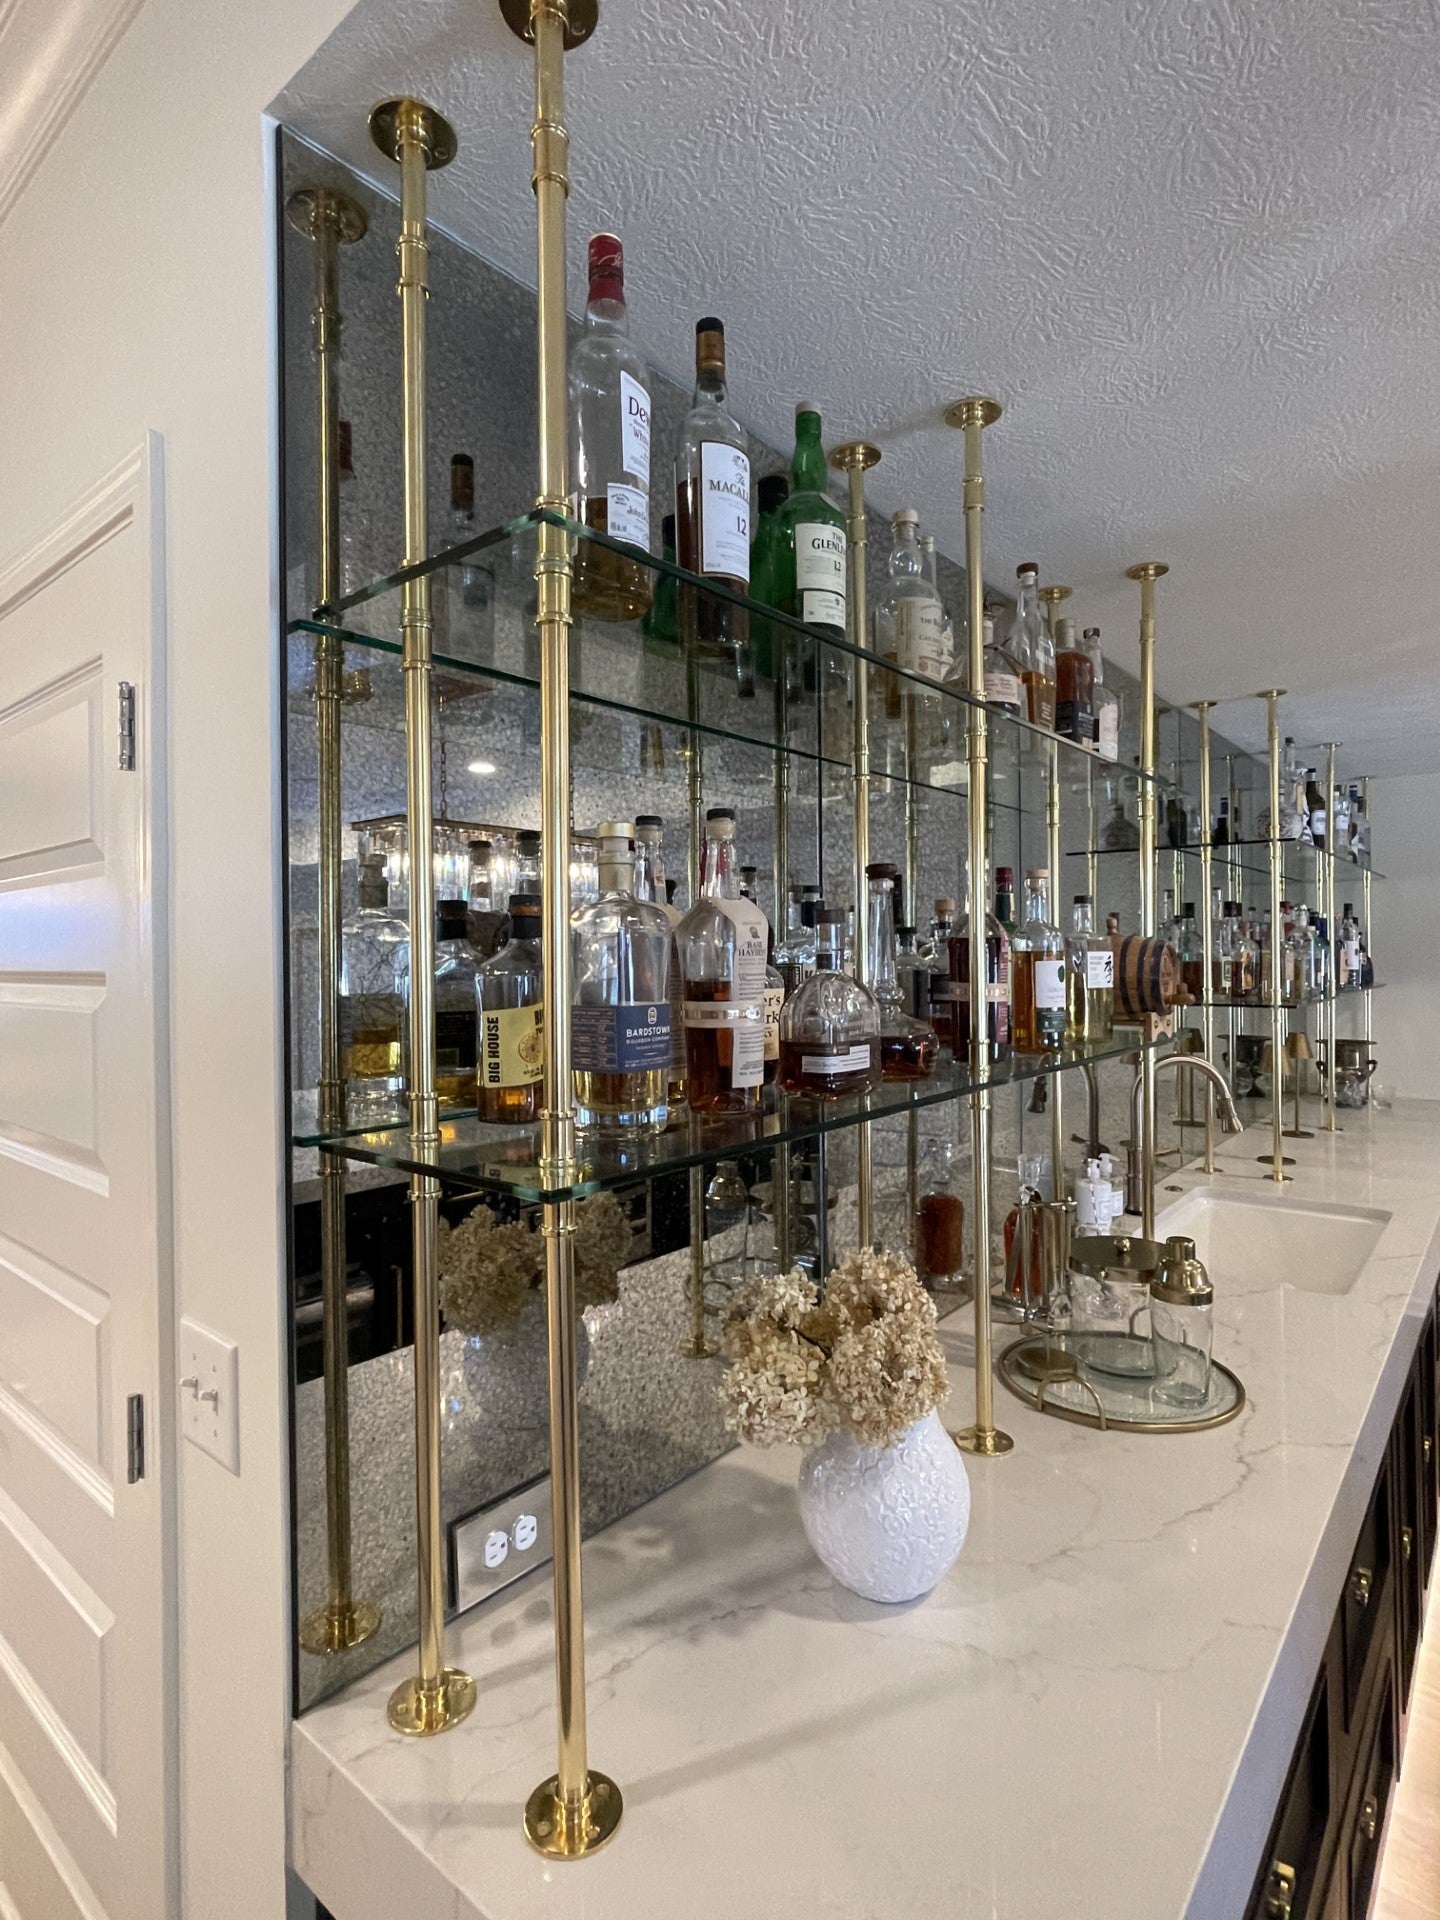
Double Rail Counter to Ceiling
General frame structure
This structure is only attached to the
ceiling and stands on the counter.
The counter will carry the load. The
ceiling mounts are helpful in keeping
the rails straight and stable.

Identifying your parts
Use these reference photos with the install instructions to make install a breeze! Note not all units contain every part labeled - refer to the card in your package for your full parts list.

Instructions
1. Lay out all the pipes to get a sense for how everything will be assembled.
2. Working from the bottom up, add each shelf by threading the short pipe above the coupling through the glass. Place a washer on the underside between the coupling and the glass. Work your way up, shelf by shelf, until you get to the top.
3. At the top, you may need to tighten down the rails a bit more than needed to get the top flanges on and loosen them to get the top flush with the ceiling. If there are variations in the space or microadjustments that are required, you can use the wooden shim to create more of a tight fit.
4. Use a level to ensure all shelves and rails are straight and level. Make small adjustments as necessary.
5. Secure the ceiling mounts by drilling a hole THROUGH the flanges holes with a 3/16” bit. You can directly insert the anchor through the flange into the ceiling.(You don’t need to mark the hole, drill, insert anchor, move it back, etc.).
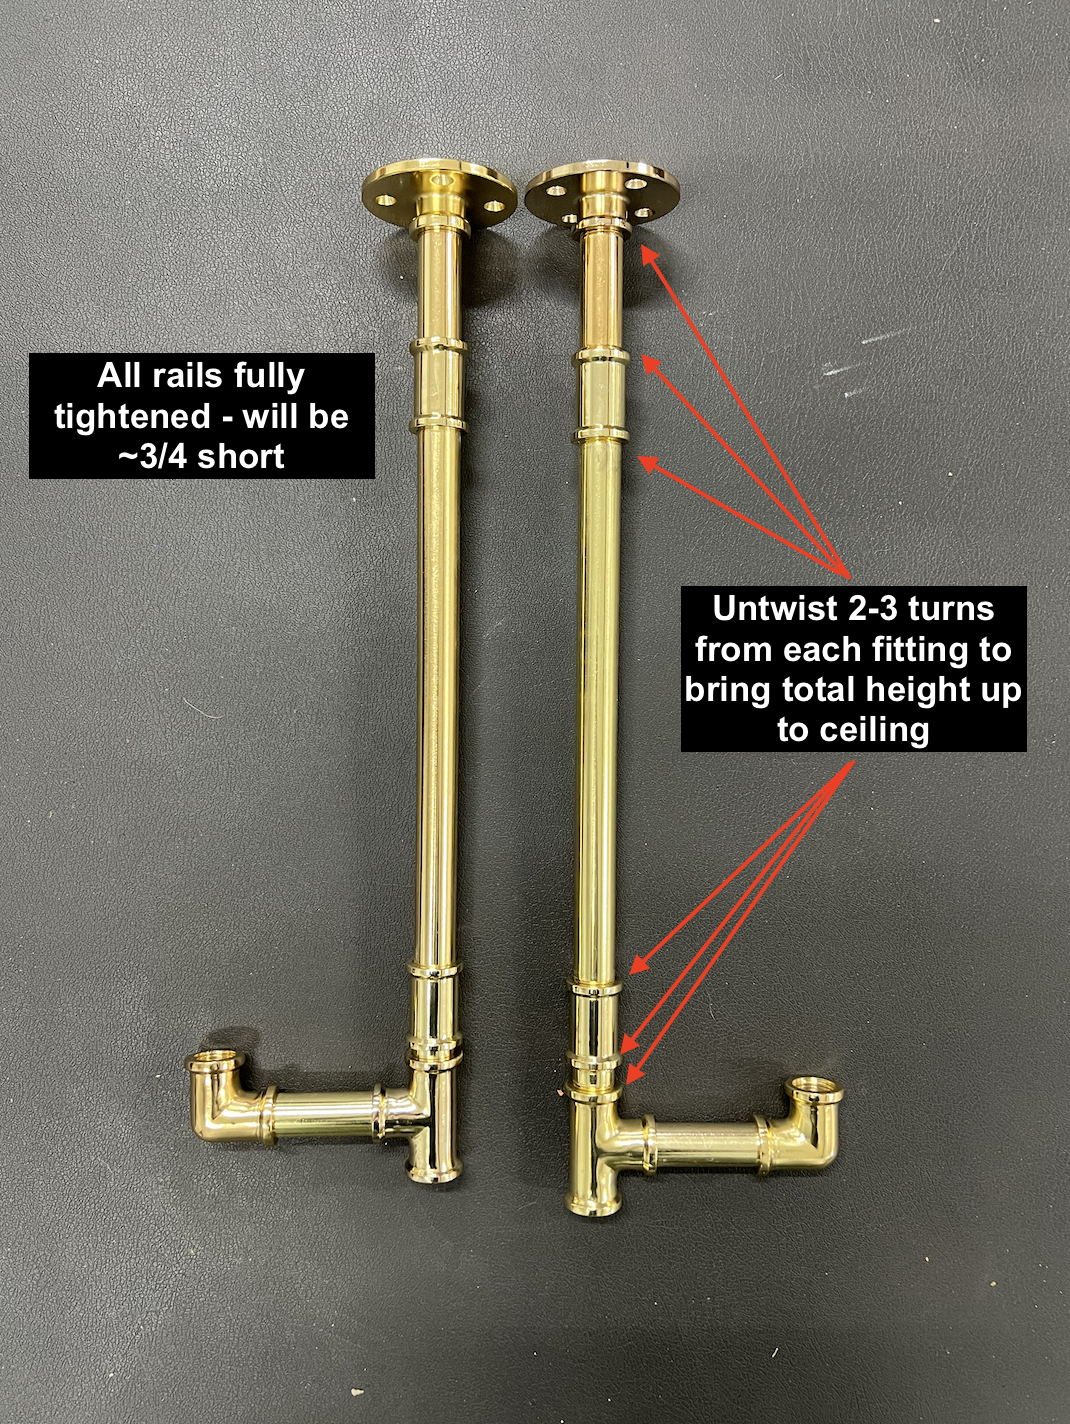
Modern Loft Units
Please note that these units are intentionally constructed to be ~3/4" short. This is to ensure you have enough room to slide the top ceiling mount on during assembly.
As a final step, you'll need to reverse pipes out of the top layer fittings by 2-3 turns each to bring the total height up to the ceiling. We also include wooden discs for any shimming as needed.